Charge up the Case Air prior to using. You’ll want to check the battery levels on your camera and the device you are connecting to. Same as with tethering with a cable – make sure that all three components are fully charged before beginning – the Case Air, your camera and the device you are connecting to (phone or tablet).
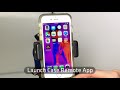
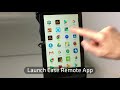
Download the Air Remote Mobile Tethering App:

Apple and the App Store are registered trademarks of Apple Computers, Inc. Google Play is a registered trademarkof Google LLC. All rights reserved.
How to Get Started
- Keep the camera turned off and connect the Case Air to the camera with the supplied USB cable into the USB data port.
- Turn on the Case Air – press and hold the button on the top of the Case Air. The blue light will flicker, then turn to a solid blue light. Once solid, the WiFi network has been created.
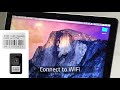
- On the device (phone or tablet or computer), connect to the Air Remote Mobile Tethering App WiFi, enter the password located on the bottom of the Case Air itself.
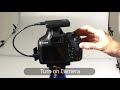
- Open the app or software, you’ll see a message there’s no camera – Now turn on the camera and allow the camera to communicate to the app via the WiFi network, refresh if needed.
We recommend shooting in RAW+JPG small.
The RAW files will save to the card in the camera.
The JPG thumbnail will transfer to the device for review.
In the app Settings, turn ON:
- Auto Thumbnails
- RAW Download Ignore
- Auto Download
Make Sure
- The Case Air is fully charged, you will get a green light.
- Have fully charged batteries in the camera.
- Charge up the device you are connecting to – iOS or Android.
- Disable Personal Hotspot and Bluetooth – you may need to put the device into Airplane Mode.
- Remove WiFi cards from the camera and disable any WiFi communication on the camera.
- If the camera takes two cards, please use just one.
- The correct cable is connecting from the Case Air into the USB port on the camera.
- Close all other apps on device, run Air Remote Mobile Tethering App only.
- Give/Allow access or permissions to Air Remote Mobile Tethering App
- If connecting to Android or Windows device, disable anti-virus apps or software.
- Disable Google Drive sync or Dropbox
- Update the firware – check Update (in Settings).
- Be sure your camera has been updated with its latest firmware updates.
- Empty the cache regularly (in Settings).
The Case Air comes with the following:
- Camera Connector Cable (USB 2.0 Mini-B 5-Pin)
- Camera Connector Cable (USB 2.0 Mini-B 8-Pin)
- Camera Connector Cable (USB 3.0 Micro-B)
- USB Connector Cable (OTG)
- Device Charging Cable
- Lanyard with Threading Tool. Watch our video on how to Connect the lanyard to the Case Air.
If you get a notification of a firmware update, please update, make sure the Case Air is fully charged before updating the firmware – DO NOT turn off the Case Air or the device you are connected to during the firmware update, this will cause a malfunction.
Download Product Manuals
Connecting Case Air
Watch Instructional Videos
*Demonstrated on Apple iOS. Air Remote, referenced in the videos below, is now called Air Remote Mobile Tethering App. Air Remote is compatible with select Canon and Nikon cameras and both Air Direct and Case Air Wireless Tethering Systems.


Submit an FAQ Question
For Technical Support or Customer Service, please email us at customersupport@tethertools.com
Additional details or to purchase a Case Air Wireless Tethering System
AeroTrac
Some tables will come from the factory with slightly excessive rigidity. This can result in the AeroTrac table not laying perfectly flat when opened and/or it may be difficult to slide the bar into the locked position. If your table is not perfectly flat when opened or you are having difficulty sliding the locking bar, you can easily correct this. Applying slight pressure to each half of the underside of the table will “teach” the table to open to the correct position. This will ensure the table is flat when open and that the sliding bar can easily slide into the locked position. The following video demonstrates the process for ensuring that the table opens correctly and that the sliding bar can move easily across the spine of the table. You will only need to perform this process once.
Air Direct
Apple released the first Apple M1 Chip, which is a central processing unit for its line of Macintosh computers. It was designed from the very start to work with macOS Big Sur. At this time, the Air Direct Utility software supports the latest Windows and Mac operating systems but is not currently compatible with devices using the latest Apple M1 chips.
Yes. For more detailed instructions on how to set this up with your Sony camera, read our helpful tech tip here.
Climate and Temperature
Compatibility

Compatibility
Apple released the first Apple M1 Chip, which is a central processing unit for its line of Macintosh computers. It was designed from the very start to work with macOS Big Sur. At this time, the Air Direct Utility software supports the latest Windows and Mac operating systems but is not currently compatible with devices using the latest Apple M1 chips.
We’re happy to announce that those who wish to update to Big Sur on their Mac, they are now afforded the opportunity to utilize the Air Direct Wireless Tethering System seamlessly while being on the latest macOS.
Note: If you have a previous version of the Air Direct ADU software, please update to the latest version of the Air Direct ADU software prior to installing macOS Big Sur. Updating to macOS Big Sur prior to updating the Air Direct ADU software will require additional steps. For more information regarding the Big Sur compatible Air Direct ADU update, visit https://tethertools.com/adu/.
Installation
For complete instructions on how to determine which version of Air Remote you have installed, please visit this page.
Our developers are continuously making improvements, adding features and sometimes fixes to Air Remote Mobile Tethering App. When updates are available, please follow the instructions here to update your device.
For complete instructions on how to determine which firmware version of Case Air you have installed, please visit this page.
Installation
Transfer speeds will vary based on a number of factors including the camera, file format, tethering software, and computer specifications. When using the faster 5 GHz setting on the Air Direct, the average user will see real-world performance of transfer rates in the 4 – 7 MB/s (Megabyte per second) range.
To estimate the average real-world transfer time of your files, you can divide the file size (in Megabytes) by an average transfer rate of 5.5 MB/s. The result is a rough estimate of the time that it will take to transfer the file via the Air Direct when using the 5 GHz setting. See the example below:
If your camera produces files that are roughly 35 MB. Divide the file size by the average transfer speed (5.5 MB/s) to get a rough estimate of the transfer time:
35 / 5.5 = 6.36
The 35 MB file will take approximately 6.4 seconds to transfer via the Air Direct when set to 5 GHz.
Note: Slower processors, limited computer resources and tethering software image processing can further delay the image before it is available for viewing within the tethering software.
2.4 GHz will transfer at a slower rate. To roughly estimate transfer times on the 2.4 setting, you can double the time estimated using the 5 GHz setting.
The included DC Power Cable provides flexibility to power the Air Direct with alternate power sources, and to hot-swap a discharged battery for a fresh battery. Other power sources you can use, depending on your application, include a USB battery bank or a USB wall adapter. Minimum output of the battery or wall adapter should be 5V/2A.
NOTE: Using the DC Power Cable will only power the Air Direct, it will not recharge the TT-LP-E6 battery.You will need to reset the Air Direct device to the factory settings in order to reset the password to the default, 12345678. To Reset, power the Air Direct, either with a battery or the DC power cable. Wait until the power light and the Wi-Fi indicator light are solid. With a small pin, press the pin into the small pinhole on the side of the device and hold until the blue light begins to flicker. Remove the pin. The device is now Reset.
Setting Air Direct WiFi as your default WiFi network will help to automatically connect when the Air Direct is on. This is helpful in locations with many WiFI networks like events or conferences. Also setting Air Direct as the default will also prevent disconnections in a location where another default network may already be established, like a studio or home network.
Mac OSX
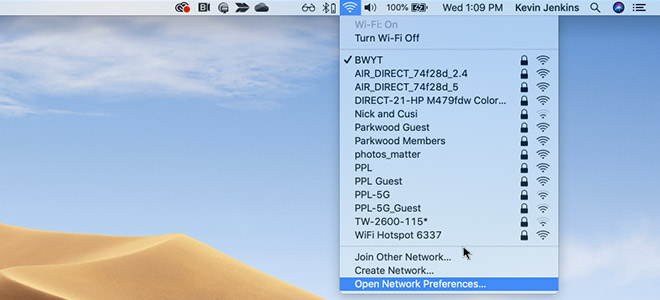
Navigate to Wi-Fi > Open Network Preferences in the top navigation bar.
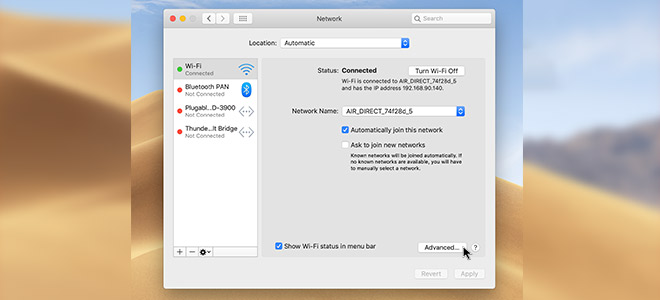
This will open the network dialog window, check Automatically join this network, then click on “Advanced”.
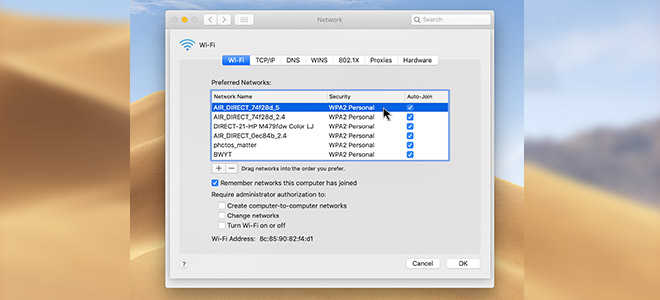
In the advanced settings, drag the Air Direct Wi-Fi network (AIR_DIRECT_XXX) to the top of the preferred wireless networks list. The network at the top has the highest priority.
Windows – Click the wireless icon in the notification area. Select the wireless network named “AIR_DIRECT_XXX”. Check the box for “Connect Automatically” and then click “Connect.” This automatically moves the network up the priority list.
IOS – There is no way to directly update the priority on an iOS device. To prioritize networks on iOS, use a Mac OSX computer that shares the same iCloud account as the iOS device. Update on the MAC computer and iCloud will sync to all other devices.
Android – Prioritize Wi-Fi networks must be done via an App. Available Apps included WiFi Prioritizer or Wi-Fi Switcher both which are free.
Air Direct can achieve transfer at up to 200 feet. The 2.4gHz allows for longer distances. The 5gHz will give you faster transfer rates.
Yes, you can change the password in the ADU preferences section. Select Preferences, then Update Password.
The Air Direct connects to your camera’s USB port, leaving the hot shoe free for use with other equipment. The Air Direct has been designed with flexible options for mounting and use. Our recommended option is to mount the Air Direct Arca Clamp to your L-Bracket.
Other alternative methods for mounting and use include:
- Mount on the camera’s hot shoe if it is available.
- Attach the Air Direct to a tripod leg using the StrapMoore.
- Mount to an arm or clamp with the 1/4″-20 thread on the bottom of the cold shoe.
- Use a longer USB cable, allowing you to carry the Air Direct in your pocket.
ONsite Aero V-Mount
ONsite D-Tap Battery with V-Mount
ONsite D-Tap to AC Power Supply
- Smartphone (10Wh) 15 Recharges
- iPad Pro 12.9-inch (38Wh) 4 Recharges
- Laptop (50Wh) 3 Hours
- 40” LED TV (30Wh) 5 Hours
ONsite Relay A
Optima 10G
The TetherPro Optima 10G is a true USB-C 3.2 Gen 2 cable capable of full 10Gbps data transfer. The 2.0 Hub alert you may see the first time you connect it is completely normal.
Optima’s cables contain TetherBoost™ technology (the small rectangular modules) that require a small amount of power (5V/1.5A) from your host device (computer, tablet, phone, etc.). The power activates the retimer chip which amplifies the data signal to maintain fast, reliable performance over longer distances. All data transfer bypasses the 2.0 hub. The cable operates fully within USB-C 3.2 Gen 2 specifications and capable of full 10Gbps performance for high-speed tethering.
You’ll only see this alert during the initial connection:

The connected hubs will show up in the System Report as seen below:

If you would like to test your transfer speeds, we suggest doing so via software. The easiest way to do that is to use software like BlackMagic Disk Speed Test (Mac) (PC) to assess the read and write speeds. We recommend using a self-powered USB-C Solid State Drive (SSD) that supports 10 Gb/s or faster. The primary interest is the Read speed, because the image files are read from the camera side of the connection.
A couple of important notes when using BlackMagic Disk Speed Test:
- BlackMagic Disk Speed Test reports the results in MB/s (Megabytes per second), where transfer speed is measured in Bits (not Bytes) per Second. So, you must perform a conversion by multiplying the MB/s figure form the software by 8 in order to arrive at the Mb/s speed. Further, to convert Mbps to Gbps, you would divide the number by 1000.
Example: We will assume the BlackMagic Disk Speed Test Reports a Read speed of 830 MB/s.
830 MB/s → 830 x 8 = 6,640 | 6640 / 1000 = 6.64 Gb/s
- Please keep in mind that software like Black Magic Disk Speed Test is measuring real-world performance, which will always be below the theoretical maximum that the USB protocol supports (5 Gb/s, 10 Gb/s, etc…). Therefore, you will always see figures that are considerably lower than the USB protocol supports.
- While this test does help to understand the cable performance, it is primarily a test of writing to a hard drive. As a result, hard drive performance will have a major impact on this test. Solid State Drives (SSDs) will generally have much better performance, so they are advised for this test. In any case, please note that the specific hard drive used in this test can also dramatically affect these figures.
When tethering, transferring large image files while simultaneously charging the camera through USB Power Delivery (PD) can create stability issues and may shorten the lifespan of the cable.
For this reason, camera manufacturers generally recommend disabling USB charging during tethered shooting. However, some camera models either make this setting difficult to find or do not allow USB charging to be disabled at all.
Optima 10G cables are intentionally designed without Power Delivery to eliminate this potential point of failure. This means you don’t need to remember to change camera settings before every tethering session, and cameras that cannot disable USB charging can still be used reliably.
By removing Power Delivery, Optima 10G cables provide a more stable and dependable tethering connection while helping extend cable longevity. Simply plug in and shoot with confidence.
Uni-directional cables communicate data and commands bi-directionally, but necessitate that one device acts as the host (computer) to the connection and the other device as data source (camera). This allows for the most efficient and reliable method to transfer large data files. The devices will be able to fully communicate with each other, as happens with bi-directional cables. There are multiple communication ‘lanes’, so camera control can occur simultaneously as the images transfer. The Optima 10G cables are specialized to isolate the data transfer direction for maximum efficiency and reliably.
- Power Delivery (PD) is not supported to ensure reliable tethering
- The Rp resistance setting of USB CM, on the camera side is 56K
- The default current is 5V/0.9A
The USB 3.2 standard has two methods for transferring power. All USB protocols have a built-in method for transferring (relatively low) levels of power. Just as the USB standard stipulates transfer speed, it also stipulates power draw as part of the standard. In the case of 3.0 and above, that is 5V | 1.5A.
The USB 3.2 standard introduced a secondary (parallel) method for transferring power called Power Delivery (PD). This method allows for a much higher levels of power to be transferred (along with the traditional, relatively lower power mentioned above). PD can allow for up to 240W of power to be provided. This Power Delivery feature is known to cause instability in certain types of connections, including tethered connections. For this reason, the Power Delivery feature has been removed from the Optima 10G cables in order to provide the most stable connection possible. The built-in low-level (1.5A) power provision of USB 3.0 and above, remains part of the cable.
The Photo/Video industry has unique and highly demanding requirements. In order to meet these needs the Optima 10G pushes the limits of USB protocols to maximize speed, data transfer and reliability to achieve long distances (65’/20m) required. We have made intentional engineering decisions to meet these specific photo/video requirements first and foremost. Cameras do not require BUS power as cameras have their own internal battery power sources.
If your application requires achieving longer distances via USB and your Source device is self-powered, the Optima 10G may be a good choice.
For any questions regarding technical specs and performance, please contact TechnicalSupport@TetherTools.com
We understand how hard our industry can be on gear. Careful design and thought has gone into the construction of all of our cables.
The TetherBoost octangular housings is designed with reinforcements to withstand the rigors of extreme uses on production sets, which include production carts rolling over them, people stepping on them and much more. In fact, production trucks have rolled over them and the IC chips and housing remain unaffected.
Thermoplastic polymer provides a lot of benefits for its unique hi-impact properties, weather resistance, durability in various environments, corrosive resistance and ability to withstand and dissipate heat efficiently. All cables are thoroughly tested to exceed industry specifications. Our engineers conduct rigorous environmental reliability testing which include:
- High and low temperature storage and operating testing
- High and low humidity storage and operating testing
- Constant high/low operating temperature with high/low humidity testing
- Salt spray testing
- Heat dissipation and thermal equilibrium testing
Our testing is designed to ensure outstanding product reliably, durability and lifespan.
While we have not conducted environmental reliability tests on competitor’s cables, a peak under the hood of aluminum and carbon housings reveals PCBA’s tightly encased in injected molded plastic which may confine airflow and have a detrimental effect on heat dissipation and product lifespan.
TetherBoost Core Controllers are the rectangle boxes that are precisely positioned in the cable line. The TetherBoost is a specialized Integrated Retimer Circuit (IRC) to meet specific requirements to achieve longer cable distances. Depending on the length of the cable there may be multiple IRC’s throughout the cable. The IRC enhances signal integrity, compensates for signal weakness, and extends signal transmission distance. The TetherBoost has been designed so no external power sources are required.
Ferrite Cores are the large cylinders that would often be located on one end of a USB-A cable. Ferrite cores were used primarily to filter out environmental noise and frequencies that could have affected data transmission. If you recall, prior to USB-C technology, USB-A cables carried small amounts of power to charge small devices like phones, batteries and tablets. These cables, while still shielded to block the low power in the cable, could potentially be susceptible to outside noise. Adding a ferrite core provided additional protection to eliminate this risk.
Enter USB-C, which carries a lot more power internally. To block out noise coming from the power inside the cable, major advancements in shielding technology were required. New internal shielding, found in higher quality USB-C cables, protects the data wires from the internal power running through the cable. This shielding is more than adequate to protect from environmental noise as well, making external ferrite cores no longer necessary.
TetherPro cables are the optimal balance of heavier gauge wires while still being very easy to work with and coil on a set. While a heavier gauge wire is more expensive to manufacture, the benefits far out way the costs. A thicker wire allows for better heat dissipation throughout the entire cable; thus everything runs cooler, including the TetherBoost IRC and PCBA. Lower overall heat increases performance, reliability and product lifespan.
The custom formulated exterior cable casing is designed to protect the internal wires and extend the life of the cable. Optima 10G cables are the optimal balance to withstand being stepped on and having carts rolled over them while still being easy to work with, remain clean and easy coiling for storage.
- 10G 31ft cable, voltage drop-off for VBUS is 0.42V and drop-off for GND is 0.172V
- 10G 15ft cable, voltage drop-off for VBUS is 0.18V and drop-off for GND is 0.11V
- The longer the cable and the thicker the gauge conductor (thicker wire), you will experience improved data transfer, increased reliability and minimized power drop-off
- Inversely, the longer the cable and the thinner the gauge conductor (thinner wire), you will experience degraded data transfer, less reliability and increased power drop-off.
Product Information and Use
Peel backing off RapidStrip (RS). Attach RS to Q20 device. Peel backing off the other side of RS. Press device, with RS, firmly on mounting surface for 30 seconds. Let cure for 3 minutes. Press device firmly against the wall again before mounting cameras or other accessories to the Q20 device. Hold articulating arm firmly with one hand while tightening device with the other hand to avoid any rotation pressure on the Q20 device.
To remove from surface, place thumb and forefinger in the grips on the RapidMount Q20. Pull slowly from one side of the device, with applied pulling pressure, to release the seal on the strip. Once removed from the surface, peel off RS. When ready to use again, repeat the process with new RapidStrip.
Loosen drawstring on SLX. Peel backing off RapidStrip (RS). Attach RS to back of SLX. Peel backing off other side of RS. Press device, with RS, firmly against mounting surface for 30 seconds. Let cure 3 minutes. Press device against wall again to ensure RS adhesive is firmly attached to the surface before mounting speedlight in holder. Place speedlight in cradle, angle light as needed and tighten drawstring to secure around joint of speedlight. SLX will accommodate an attachable trigger (transmitter) under cradle or hanging from SLX arm. Modifiers can be added to speedlights. Be sure to maintain less than 1.5lbs of gear in holder.
Purchasing & Shipping
Smart Shooter
Some users who are running MacOS 13 – Ventura may experience issues with the camera not
being properly recognized within Smart Shooter 4. While we generally recommend quitting all
other software while tethering, including software running in the background, there is a specific
software conflict on some systems that can cause connection problems on MacOS 13 – Ventura.
Cloud-Syncing software like Google Drive and Dropbox has been found to block the connection
to the camera on some systems running MacOS 13 – Ventura. Therefore, please Quit Dropbox
and Google Drive from the menu bar in order to prevent this conflict from occurring. Once
both pieces of software are quit, we expect no issues with compatible camera connections on
MacOS 13 – Ventura.
Please note that both Google Drive and Dropbox may be set up to launch automatically upon
login, which may result in an ongoing software conflict. Therefore, we would recommend
removing this software from the Login Items (System Settings → Login Items) and/or diligently
checking the menu bar for either software before starting each tethering session.
My Sony Camera works with Sony Imaging Edge, but does not appear in Smart Shooter 4 on Windows 10.
By default, the Sony Imaging Edge software utilizes a customer driver that is not compatible with other software. In order for the camera to be used with other software, you will need to change the driver that Windows is using with the camera connection. To do this, please follow these steps.
- Connect the camera via cable and then power on the camera
- Open the Windows Device Manager (use Windows search option)
- Turn down libusbK Usb Devices category. The camera will be listed as Sony Remote Control Camera.
- Right click on Sony Remote Control Camera and select Update Driver.
- In the new window select Browse my computer for drivers.
- In the next screen, select Let me pick from a list of available drivers on my computer.
- In the next screen, select the MTP USB Device option and select Next.
- Once the update has completed, you can close the window. You should also hear a chime indicating Windows has recognized a new connected device.
- The camera will be listed under Portable Devices. At this point, Smart Shooter 4 will be able to connect to the camera
Please Note: switching to the MTP driver will make the Camera inaccessible in the Sony Imaging Edge Software, so the process will need to be reversed for the camera to again be available in the Imaging Edge software.
In some situations, the Operating System might inadvertently shut down the connection between Smart Shooter 4 and Lightroom. If you have successfully installed the Smart Shooter 4 Lightroom Plug-In and are finding that your images are showing up normally in Smart Shooter 4, but not transferring into Lightroom even though you have an active tethering session, it may be necessary to reset the connection.
The following process will force Smart Shooter 4 to create the network socket connection to the plug-in:
- 1. Quit Lightroom
- 2. Open Smart Shooter 4 Preferences
- 3. Go to Lightroom tab
- 4. Disable checkbox for “Enable Lightroom Tethering Connection”
- 5. Click “Apply”
- 6. Enable that checkbox again and click Apply
- 7. Open Lightroom and begin a new tethering session
The focus stacking script relies on Smart Shooter’s ability to move focus during live view. Sony cameras do not support this feature at this time. Only Canon and Nikon cameras can be used with the Focus Stacking Script.
For most current Sony models, when tethering, it’s not possible to save to card. Some recent Sony models, such as the A7R4 and A6400, the camera does allow you to save to card. The user has to enable this on the camera menu itself. However, when this is enabled, the tethering app does not get notified of the new photos, so no preview is available in app.
- Go to the “Cameras” tab
- Select and right-click the camera
- In the popup menu, select “Set Orientation”
- On the keyboard, press the CTRL + LEFTSHIFT + ESC keys
- On the keyboard, press the CTRL + ALT + DELETE keys to show the lock screen, and then click the “Start Task Manager” button
- With the mouse, right-click the task bar and select “Start Task Manager“
 If so, click “More details” at the bottom. The Task Manager window should now look like this:
 To start the process dump, find “Smart Shooter 3” in the list of processes, and then right-click it to bring up the context menu, which looks like this:
 In the context menu, select “Create dump file“.
Once the process dump has been completed, the following acknowledge window will be presented.
In the context menu, select “Create dump file“.
Once the process dump has been completed, the following acknowledge window will be presented.
 This also shows where the process dump file was saved, in this case to the file:
C:\Users\francis\AppData\Local\Temp\SmartShooter3.DMP
Once you have this process dump file, you can send it to us at the usual address support@tethertools.com.
The file itself may be very large in size. If so, we can provide a place for you to upload the file to us.
This also shows where the process dump file was saved, in this case to the file:
C:\Users\francis\AppData\Local\Temp\SmartShooter3.DMP
Once you have this process dump file, you can send it to us at the usual address support@tethertools.com.
The file itself may be very large in size. If so, we can provide a place for you to upload the file to us.If the application crashes, Mac OS X will prompt you with the following message:

Click the “Report…“ button, and then the following “Problem Report” window is presented:

Then click the “Show Details” button, and the window is expanded to show full diagnostic information of the crash:

This is the information that you need to email to Support.
Select all the text in the “Problem Details and System Configuration” section, and then copy/paste it into an email and send it to us at the usual address support@tethertools.com.https://ssdocs.tethertools.com/user_guide-dev.html#a-file
- Windows 7 N and Windows 7 KN
- Windows 8 N and Windows 8 KN
- Windows 8.1 N and Windows 8.1 KN
- Windows 10 N and Windows 10 KN
https://www.microsoft.com/en-us/download/details.aspx?id=16546Media Feature Pack for N and KN versions of Windows 8
 To show this menu, click ‘Help’ in the top menu bar and then click ‘About Smart Shooter …’:

Manually sending as an email attachment
This is the preferred method. Here you need to manually locate the log files, so that you can attach them to an email and send it to the usual address support@tethertools.com. There is a menu option in the application to help you with this: On Windows the log files will be somewhere like:
C:\Users\username\AppData\Roaming\Smart Shooter 4\smartshooter4_log.txt C:\Users\username\AppData\Roaming\Smart Shooter 4\smartshooter4_prevlog.txtOn Mac the log file will be somewhere like:
/Users/username/Library/Application Support/Smart Shooter 4/smartshooter4_log.txt /Users/username/Library/Application Support/Smart Shooter 4/smartshooter4_prevlog.txt
- Try using a different USB cable to connect, and plug it in to a different USB port on the computer. If you are plugging the USB cable into an external USB hub, instead try connecting it directly to USB port on the computer.
- Make sure the camera battery is charged up.
- Try removing the memory card before connecting the camera. If the memory card has many photos, sometimes the computer will stay busy scanning them when you connect it, which delays Smart Shooter from being able to communicate with the camera.
- Is there any other software running that may try and communicate with the camera? Such as Lightroom (which may try to import photos) or even Nikon or Canon software?
- If you are using a dedicated external camera trigger (cable release or similar), try removing this. Such triggers can interfere with the connection if they are not working correctly.
- If your camera supports WIFI, try disabling this as it may interfere with the USB connection.
- Some older cameras have their own menu option for USB mode, such as the Nikon D300, which may be set to ‘PTP’, ‘Mass Storage’, PC Connection’. Try changing this setting and reconnecting.
Surface
Tethered Photography
Troubleshooting
Sometimes, during installation or first usage, the app does not have permissions to create a needed album in the Photos App. Check for these two things:
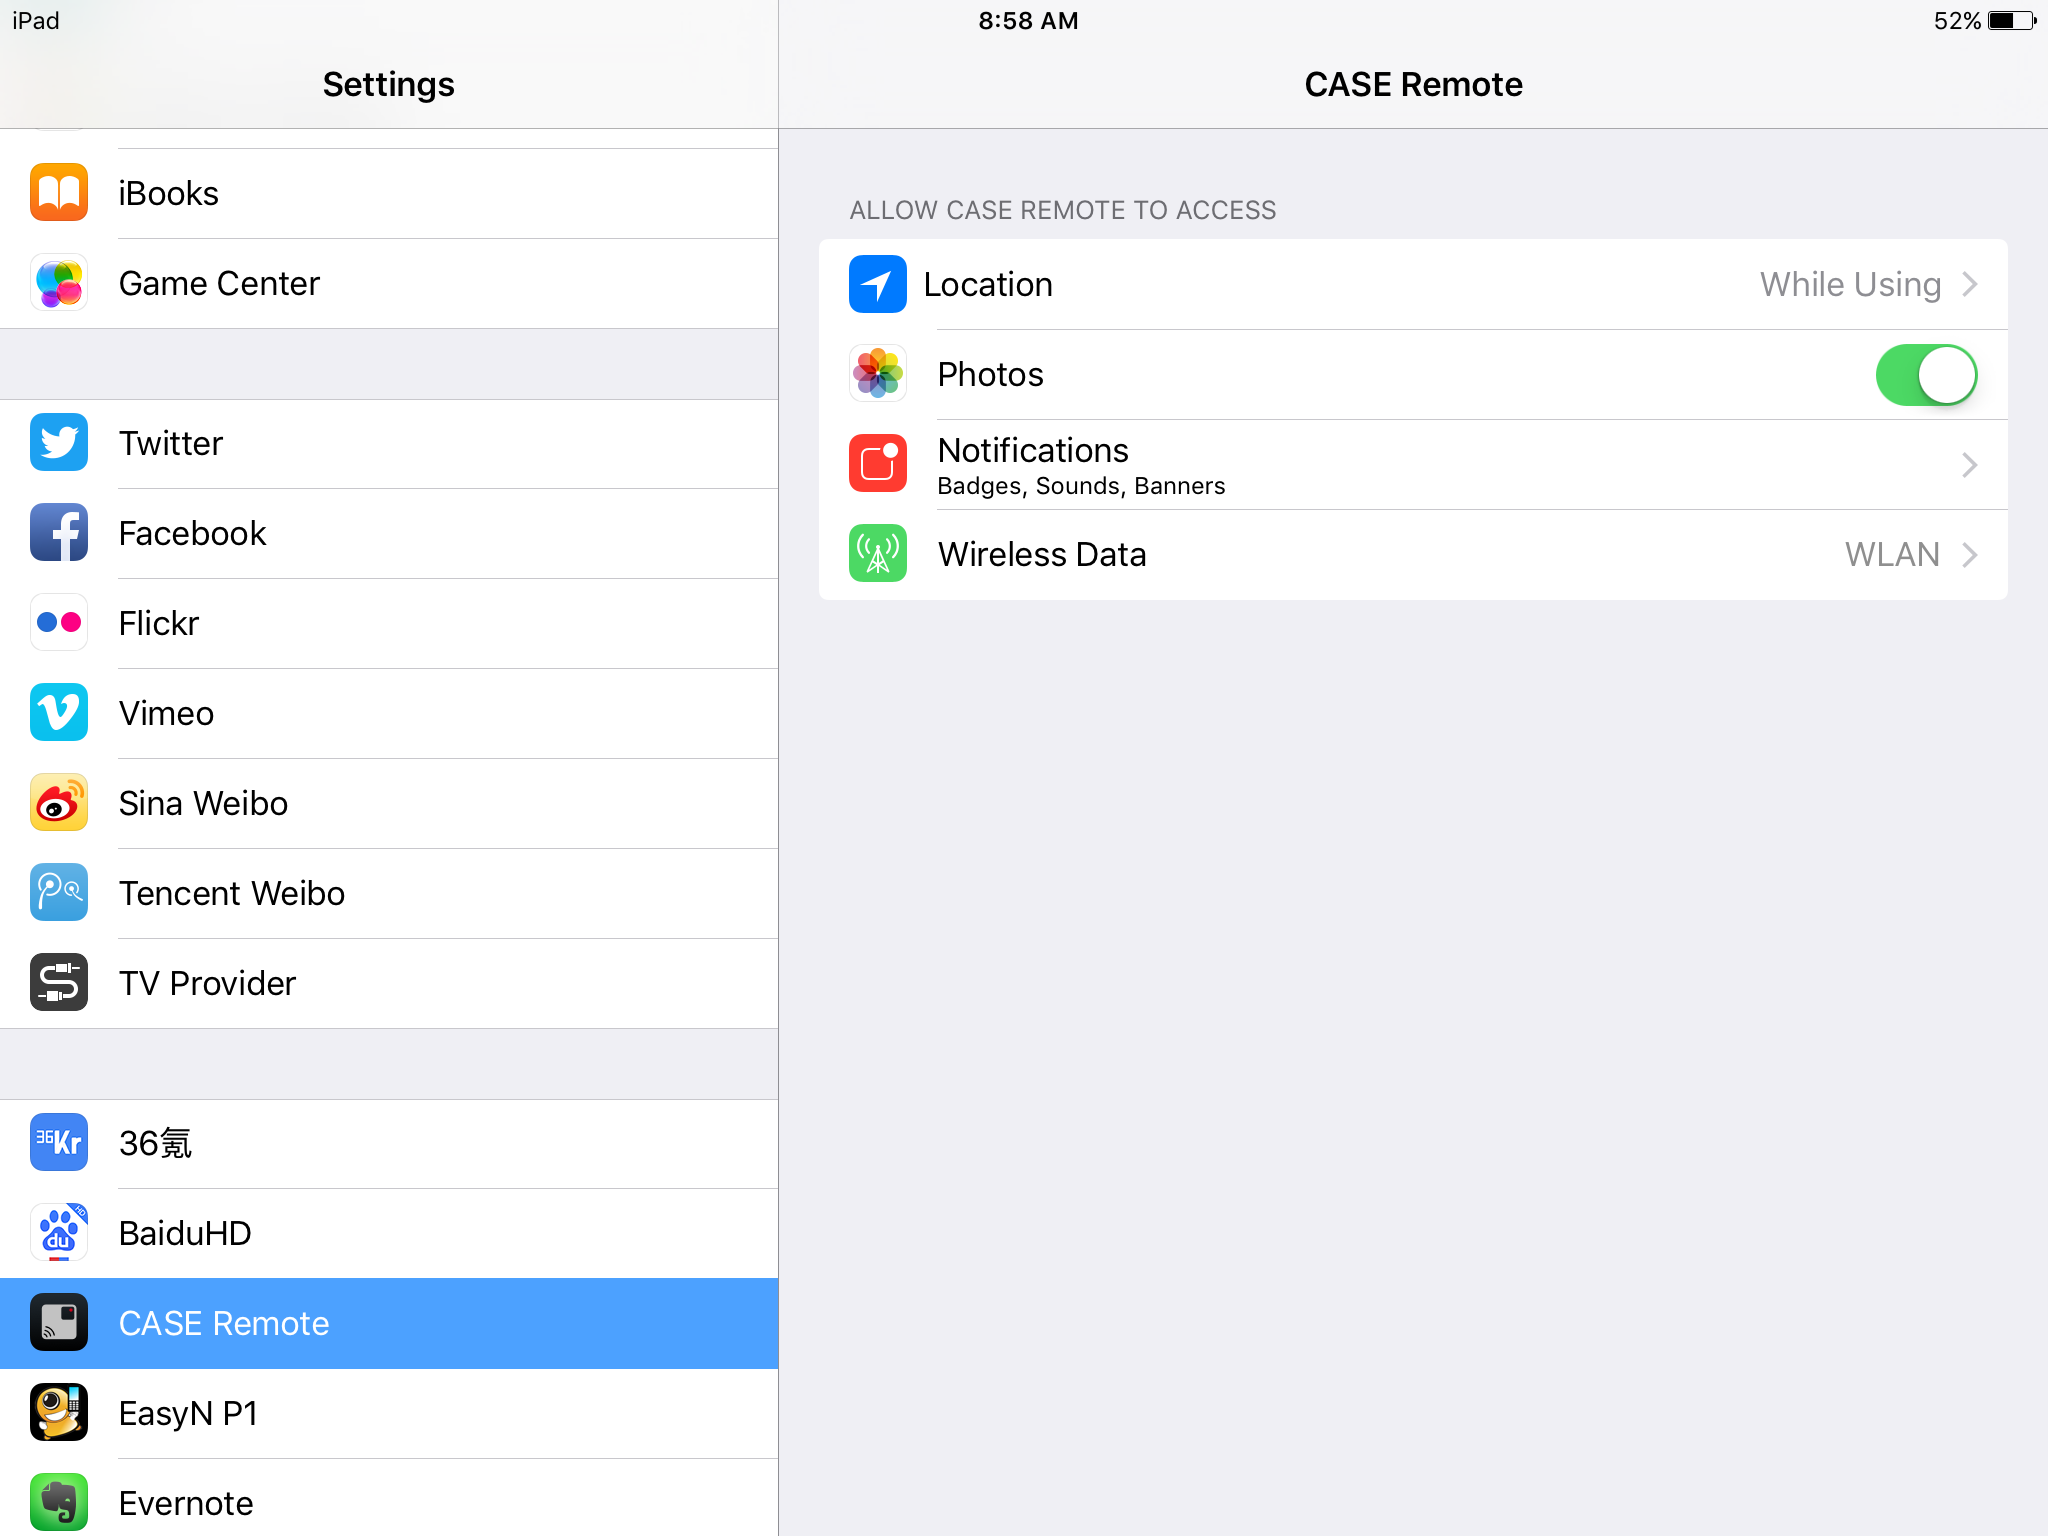
- Check that the app has permissions to access the iOS photos. Go to Settings -> Air Remote Mobile and check to see if it has photos permissions turned on.
- Create an album in the Photos app by going to Photos -> Albums -> Tap the + sign in the upper left. Name the album CASE Album
Troubleshooting
Applications running in the background may interfere with the tethering software’s ability to connect with the camera. This includes applications that are running in application windows, as well as applications running in the background and in the Taskbar or Menu Bar. Some types of applications that are known to cause issues include, but are not limited to:
- Cloud software (i.e. Dropbox, Google Drive, etc.)
- Anti-Virus or Firewall (Defender, Avast, etc.)
- Tethering Applications (Imaging Edge, Acquire, EOS Utility, etc.)
Check to make sure you only have one tethering software application open. Having multiple tethering software applications open at the same time can cause connection issues. Some software, including many camera utility applications, may launch automatically and may only run in the Taskbar (Windows) or Menu Bar (MacOS). These applications can attempt to automatically connect to the camera even if it is not clear that they are open.
Check for software running in the background:
It is a best practice to close all software that is not actively used in tethering. Check the Dock (MacOS) or Taskbar (Windows) as well as the Menu Bar (MacOS) or System Tray (Windows) to be sure no applications are running other than your intended tethering software. The Activity Monitor (MacOS) or Task Manager (Windows) can be used to identify applications that are running in the background as well as to quit those applications.
Turn off Auto-Connect and Auto-Start features in camera software:
Some software applications have settings that allow the software to automatically launch at startup and/or launch or connect when the operating system recognizes a camera has been connected. This can cause issues connecting your camera to your intended tethering software. Be sure that any installed tethering software or camera utilities are not set to automatically start or automatically connect with the camera.
Yes. For more detailed instructions on how to set this up with your Sony camera, read our helpful tech tip here.
The camera may be set to go into sleep mode after a predetermined time. When a camera goes to sleep, whether tethered wireless or with a cable, it will lose connection with the device it is connected. The camera’s sleep parameters can be adjusted in the camera’s menu settings.
The Air Direct device may also be disconnecting because there is a “Higher” priority known Wi-Fi network available. Best practices are to set your Air Direct as the highest priority network, so when the Air Direct is turned on, your computer or phone will stay locked on that network.
To set the Air Direct as the default Wi-Fi network, check out this FAQ here. If you require internet access while using the Air Direct, you can Bridge.
Currently, the Air Remote Mobile Tethering App supports Canon and Nikons cameras only.
There are many inexpensive after-market USB WiFi dongles that will upgrade legacy technology to the more recent 5GHz / Wireless 802.11ac standards. Here are some options from Amazon.
Firewalls or security software could interfere with your connection. We recommend following the same best practices as when tethering with a cable. While shooting, disable any anti-virus software and/or firewalls. You may also want to disable Google Drive and Dropbox from syncing in the background. As always, run only one tethering software at a time for best result.
Tethering with the Air Direct to your computer is the same as tethering with a cable. Make sure you follow the same tethered workflow best practices when using the Air Direct – update your camera firmware, have only one tethering software program open at a time, disable antivirus software and/or firewalls. If connection cannot be made, reestablish the connection from camera to computer following the Quick Start Guide Steps.
Usage
The Case Air will allow you to shoot at whatever quality setting your camera is set at. If you shoot RAW, the Case Air will handle the RAW file in the following manner depending on operating system:
- iOS: If you shoot in a mode that includes a RAW file, the Case Air will send the JPG and the RAW thumbnail (not the full RAW file). There will be a thumbnail icon of the RAW file to let you know the RAW files was captured.
- Android: If you shoot in a mode that includes a RAW file, the RAW file will be sent to your Android device. Since the RAW files need a special software to open, it will not show in the Android photo gallery. You will need to find a folder named “Air Remote” in your storage, all the files you download are in this folder. If you can’t find the folder, you can search “Air Remote” in your local storage.
- Mac & Windows: If you shoot in a mode that includes a RAW file, the RAW file will be sent to your computer. This will be a configurable option shortly.
Client Lock Mode removes all camera controls from the Air Remote Mobile Tethering App main display so that your camera settings can’t be changed, or the camera controlled. Read More: Client Lock Mode Added to Case Air Wireless Tethering System
Yes. It is possible to shoot images with the Case Air and your camera and have those images populate into a Watch Folder, also known as a Hot Folder. Both Lightroom and Capture One will display your images as they are detected in that Watch Folder.
It is a two-step process to set up a Watch Folder. First, you set up the folder where Case Remote will save your images (Instructions: Mac or Windows).
Secondly, you point either Lightroom or Capture One to monitor that folder for new images (Instructions: Adobe Lightroom or Capture One).
Plug the small end of the cable that came with your camera into your camera and the other square end into the female side of the OTG adapter. Plug the other end of the OTG adapter into the Case Air.
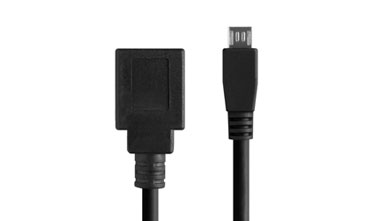
USB Connector Cable
(OTG)
Please note that many cameras will not do exposure previews in movie shooting mode. This is a limitation of the camera, not the Case Air. This includes but is not limited to the Nikon D800 and D810.
- The Case Air is fully charged (green light) and you have fully charged batteries in the camera well.
- Disable WiFi communication on the camera itself and/or have removed any WiFi cards in the camera.
To start up please try the following:
Shut everything down. Turn off your camera and the Case Air. Completely close the app or the software, do not simply not minimize it.
- Keep the camera turned off
- Create the WiFi network by turning on the Case Air (press & hold 2 seconds, blue flickering light indicates CA is creating WiFi, solid blue light WiFi network is created)
- Connect your device to the Case Air WiFi
- Open the app or software
- Turn on the camera so the app/software will then recognize the camera.
If you get a notification of a firmware update, please update, make sure the Case Air is fully charged before updating the firmware.
Video
The audio is recorded by the camera and saved with the video.
Playback is only possible when you download the video from the Case Air Album – or when connected to a Mac laptop, Photos. Then the downloaded video plays on the laptop, with the audio recorded by the camera. It’s not possible to playback the video while in the Air Remote Mobile Tethering App.
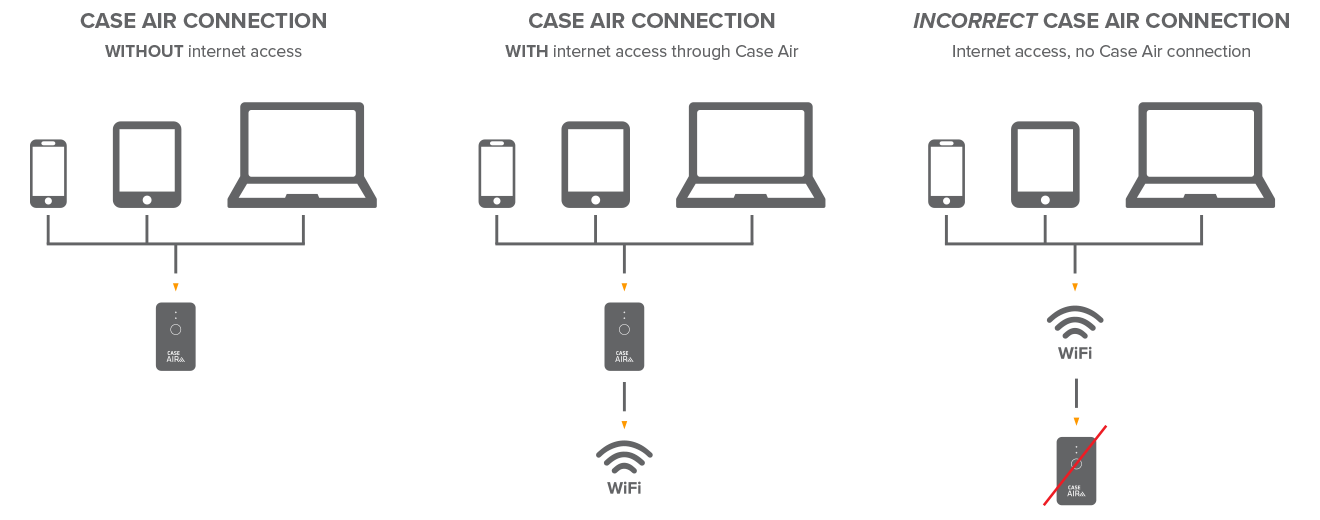
WiFi Router
Going through a router is also not an option since the device has to connect to the Case Air even if the Case Air is connected to a router.
X Lock Universal Adapter
Submit an FAQ Question
Need further assistance? For Technical Support or Customer Service, please email us at customersupport@tethertools.com