This post was written by professional photographer Chris Garrison using the wireless tethering system, CamRanger.
In the Beginning
I have been using remote cameras and tethering for a variety of action sports and commercial clients for years. When I use remote cameras I am able to get second angles as well as angles I cannot access during the action. When I am tethering directly to my computer I am able to instantly view and edit my images full-screen onsite. I can also set up real-time client viewing if needed for specific shoots.

These options have always worked great for every situation but each has had a variety of drawbacks I felt held me back in the past. Remote cameras always work well with any PocketWizard and a motor drive cable. The biggest drawback is there are no controls over the camera and no way to view the exact shot you have. Tethering works very well with cables from the camera connected directly to the computer that can be mounted on any mountable workstation. The largest drawback of tethering is the ball and chain feeling I get with the wires.
Going Wireless
There have been options on the market that solve one or two problems but then would fall short in other situations. Nikon has been making wireless transmitters for cameras for a long time. The early ones were large and bulky, offered no camera control, were a nightmare to set up, and cost a quarter of what the camera cost. The newer ones are great and offer limited camera control but have slow upload speeds and eat the camera battery. They are also very costly for the higher-end models, but very inexpensive for the lower-end cameras. The Eye-Fi card is a good inexpensive option but gives zero camera control.
CamRanger – Chris’ Wireless Solution
Finally, the CamRanger came out and saved my life! The system offers everything I could ask for out of my Nikon camera system. I am able to remotely set up my camera and have full control over almost every option of the system, even manual focusing. I have the feel of holding my camera in my hands when it is mounting up on the roof . This is also very helpful because I can view the image right from my iPhone or iPad to see if I nailed the shot and if it is in focus. I tend to almost always shoot with speedlites. When I set up a remote camera I use PocketWizards as the transmitter on the camera and the CamRanger with my iPhone as the camera remote trigger. This setup allows me to check for athlete style, action and my lighting style right from my phone!

I also tend to run into a lot of last-minute same day deadline assignments on the editorial side of my life. The CamRanger has come to my rescue many times in these situations. The jobs usually involve being in very remote place, in very bad situations with very limited time. In the “good ‘ol days’ I would normally shoot as much as I could until we thought we had what we are looking for, rip back to the computer, upload the images, edit, send off to the editor, and cross some fingers. Now I am able to attach the CamRanger to the camera, turn on the Wi-Fi, connect my iPad, and set up a Dropbox folder where I can sync the images. So as I am shooting, images are immediately uploading to a folder that’s viewable on any device.
Achieving the Difficult Shots with CamRanger for Composites
I have a technique that I have been using lately for a few commercial shoots with boats and cars. I am almost only able to achieve this with the CamRanger. This style involves me shooting a series of images with different lighting. I then layer and mask everything into one photo to complete a final image. It is extremely important for the camera not to move one bit during the process. With the CamRanger I have complete control of the shutter with zero chance of the wires being touched and moving the camera.

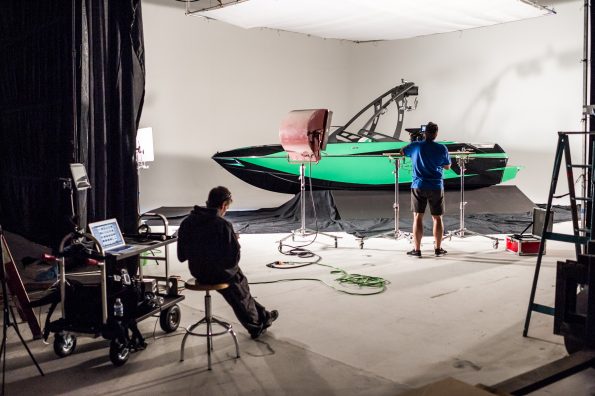
The shot below was completed with a Nikon D800 mounted on top of a Kupo C-stand about 9 feet in the air. We controlled everything from an iPad mounted to the magliner cart on a Kupo Grip Arm. We also remotely uploaded the images to the laptop for quality control and periodic focus checks. The final shot is a c4d rendering advertising campaign for the new Axis T22 from the crew at alreadybeenchewed.tv

Another option I like is the remote live view control from the iPad. The art director can watch the iPad screen as I move the camera to get the exact angle they are looking for. For the “walk through” shot of the Axis T22 below I set up the Nikon D800 on an Induro tripod with a sandbag for stability in the boat. I just easily adjusted the ball head and took direction straight from the art director. I was also able to use the live view option the “cheat” and see which way the light was reflecting to the camera to get the exact spectral highlights I was going for.


The CamRanger has so many uses and should go into every photographer’s bag. I use it for commercial shoots all the way down to a quick Instagram upload. It has opened so many new creative windows and gives me all the freedom I want on my shoots.
Click for more info on the CamRanger.
Click here for mount options available for the CamRanger.
Click here for the Wireless Tethering Pro Kit or the Wireless Tethering Starter Kit.


