

One of the best ways to streamline your photography workflow and secure your assets is by utilizing external hard drives. Backing up image files to external drives while shooting offers added security and minimizes the changes of lost or corrupt data. Laptops are great to use on location because of their portability but they’re not ideal for heavy editing. Shooting to an external drive saves the steps of downloading the files from the laptop drive and transferring them to a desktop. Instead, simply unplug the external drive from the laptop, plug it into the desktop and begin editing.
In addition to saving valuable space on your laptop’s internal drive, and not clogging it up with massive RAW and JPEG files, shooting to external drives allows you to set up a RAID back up system, which makes a mirror copy of your files on a second hard drive – all automatically and all in real-time. We all have files stored we know we should back up, and while we all hope it will never happen, sometimes hard drives do fail.
When shooting with a Tether Table Aero, the Aero XDC external drive compartment makes it easy and convenient to store images on one or two drives. The XDC is available in solo or duo and the unique XDC design frees up usable space on your Tether Table by mounting your drive(s) under its surface.
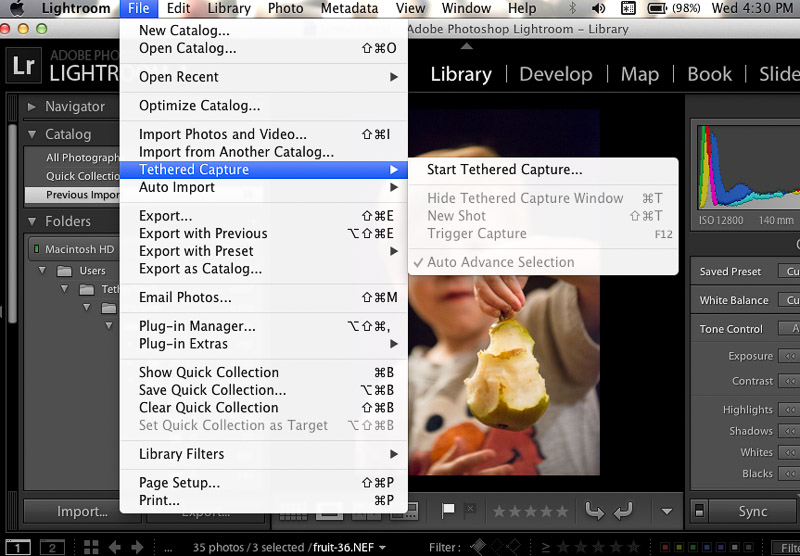
Shooting to an external drive during tethered capture is simple. Here’s a simple step-by-step guide using Lightroom that walks you through creating a set-up that gives you security and convenient image portability. (NOTE: Steps are the same for all tethering software options.):
- Connect your camera to your computer using your tether cable.
- Plug your hard drive into your computer using the cable that came with the drive.
- From your tethering software program, start a tethered capture session.
-
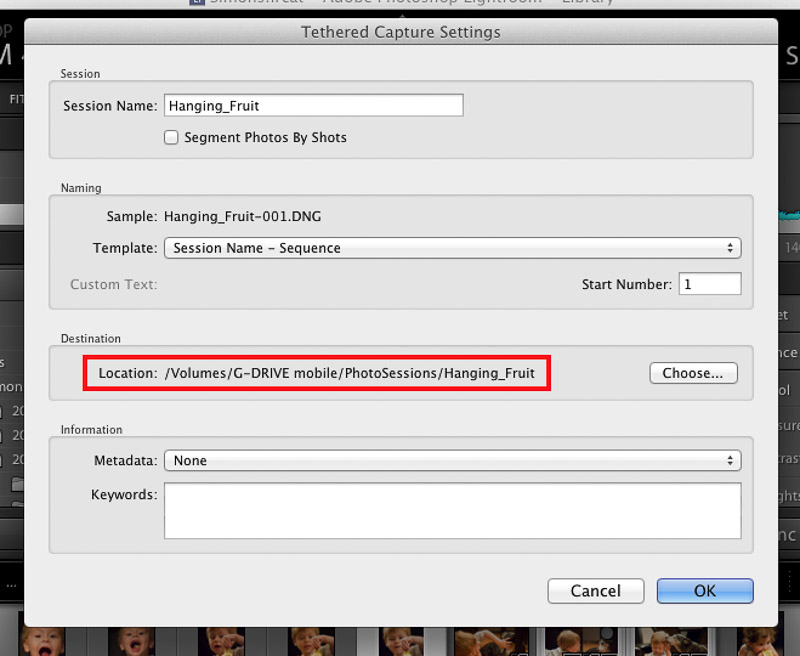
Set your image destination folder to send images to your external drive
- While shooting tethered, even though the large image files are being sent directly to your hard drive, Lightroom, Capture One, or your preferred tethering software, will keep the image previews in your software so that you can always refer back to them, even after you have unplugged the external drive.
When your session is complete, disconnect your hard drive with your new image files. Connect the hard drive to your desired desktop computer and import. Now you’re ready to begin editing. No card upload, no wait time, and hopefully a back-up copy is on your second drive as well!