
When it comes to tethered shooting in Lightroom, photographers are often confused by Adobe’s two versions of the software: Lightroom (CC) and Lightroom Classic. If you’re trying to figure out how to tether your camera to Lightroom, or you’ve searched for “Lightroom CC tethering” and hit a wall—you’re not alone.
This guide explains the differences, capabilities, and current limitations of tethering with Lightroom, so you can find the right setup for your photography workflow.
What Is Tethering in Lightroom?
Tethering in Lightroom means connecting your camera directly to your computer so that images instantly import into Lightroom as you shoot. It’s a must-have feature for studio photographers, product shooters, portrait artists, and anyone who wants to review images in real time on a larger screen.
Lightroom CC vs Lightroom Classic: What’s the Difference?
| Feature | Lightroom (CC) | Lightroom Classic |
|---|---|---|
| Platform | Cloud-based (works on desktop, mobile, and web) | Desktop-only (Windows/Mac) |
| Image Storage | Cloud sync | Local drive |
| Tethering Support | No native tethering | Full tethered capture support |
| Ideal For | Mobile editing, cloud backup | Professional tethered shooting |
Bottom line: If you want to use tethered capture in Lightroom, you must use Lightroom Classic, not Lightroom CC.
Tethered Shooting in Lightroom Classic: Step-by-Step

To get started with tethering in Lightroom Classic, follow these steps:
- Connect your supported DSLR or mirrorless camera via USB cable to your computer.
- Open Adobe Lightroom Classic.
- Navigate to File > Tethered Capture > Start Tethered Capture.
- Configure the Tethered Capture Settings (session name, file naming, destination folder).
- Click OK to begin the session.
- Use the floating tether bar to monitor, capture, and annotate images as they come in.
For detailed compatibility and camera support, refer to Adobe’s official tethering guide.
Recommended Tethering Workflow: Lightroom Classic + Smart Shooter
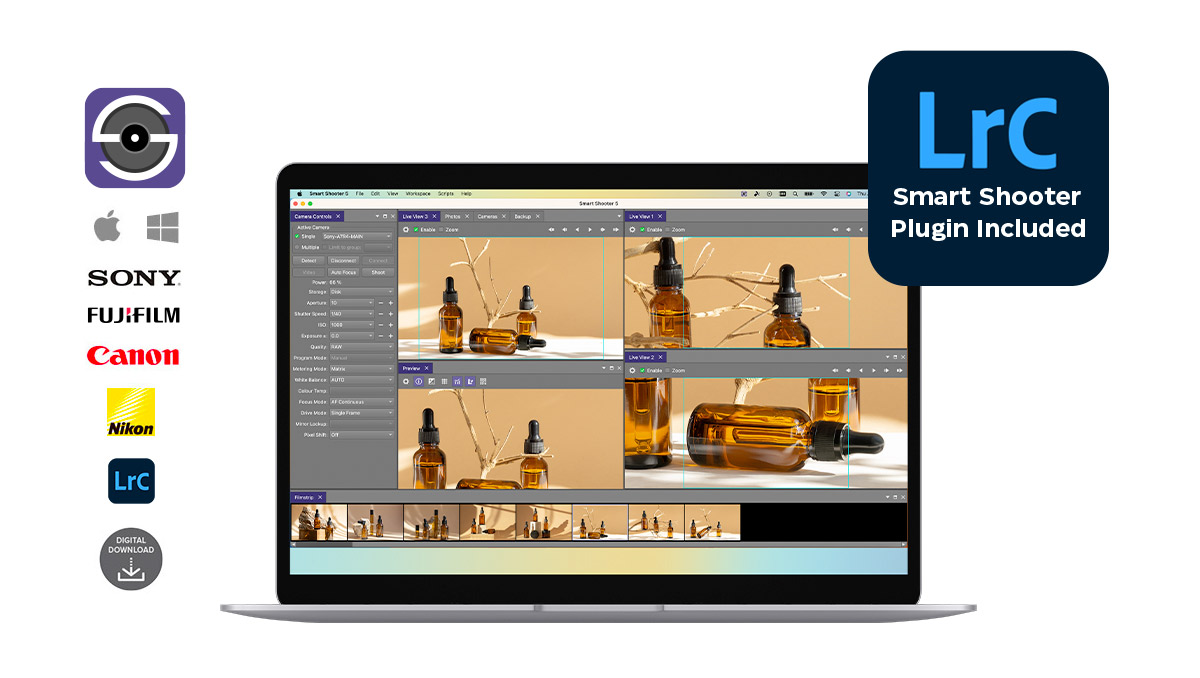
If you’re a Sony or Nikon user, Lightroom Classic tethering gets even more powerful when you integrate it with Smart Shooter. The Smart Shooter plug-in for Lightroom Classic enhances tethering with:
- Live View support
- Multiple camera control
- Customizable Workstations
- Custom scripts and automation
- Barcode/QR code scanning
- Dual save (to card and computer)
- Automatic application of Lightroom presets
- Loupe and multi-loupe view
Try Smart Shooter with a free 30-day trial
Why Can’t You Tether in Lightroom CC?
Since Adobe’s 2017 update, Lightroom CC (the cloud-based version) does not support tethered capture. This version is built for mobile convenience and cloud editing—not for real-time, wired shooting.
If you’re searching “how to tether camera to Lightroom CC,” the truth is: you can’t—not natively. The solution is to use Lightroom Classic, or third-party apps that allow remote sync and import to Lightroom CC after capture.
Supported Cameras for Lightroom Classic Tethering
Adobe regularly updates its list of supported cameras for tethering. Canon and Nikon have the most robust support, while other brands may require workarounds or additional software. Popular supported models include:
- Canon EOS R, R5, 5D Mark IV, 6D II
- Nikon D850, Z6, Z7
- Sony tethering is enabled via Smart Shooter plug-in
Check Adobe’s official list for full compatibility:
Tethering Support List