Flexibility is key when you’re shooting tethered for a client. Connecting two tethering software programs can give you additional features and capabilities you need. Capture One and Lightroom are just two tethering software programs of many that have the ability to “watch a folder” and import images. Capture One calls it a Hot Folder, Lightroom calls it a Watched Folder. Perhaps you are a Lumix GH-4 shooter, you could connect USB Tether to Lightroom or Capture One. You get the idea – any software that can read a Hot Folder/Watch Folder can connect to a second tethering software like USB Tether or Smart Shooter (check compatibility). This opens up your options and options give you greater control and flexibility over your workflow.
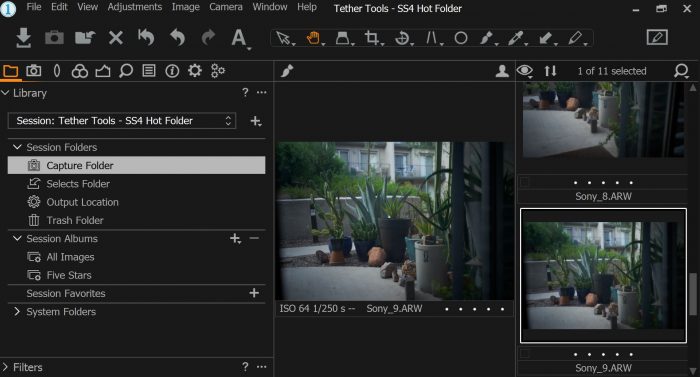
I’m showing how to connect Smart Shooter and Capture One together. I’m tethering with my Sony to my PC laptop and a larger second monitor. I’ll open and view Smart Shooter on my laptop and open Cap One and view it on my second monitor. This allows me to have fast remote control over my camera and my client can view images coming in on Capture One.
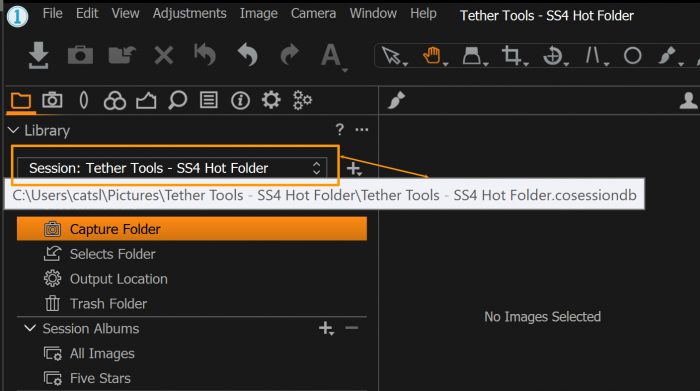
When connecting to Capture One with a second tethering software, you’ll want to decide, am I using Sessions or Catalogs? When I tether, I only use Sessions. I simply start a New Session, name it and Capture One creates all my folders for me. Capture One will store the folder tree on your hard drive. The folder I want is “Capture”. Hover over the name you gave to your new session and you’ll see the drive path – the name and location of the folders – on your hard drive. See image below. This is the location I need to drill (browse) to in Smart Shooter.
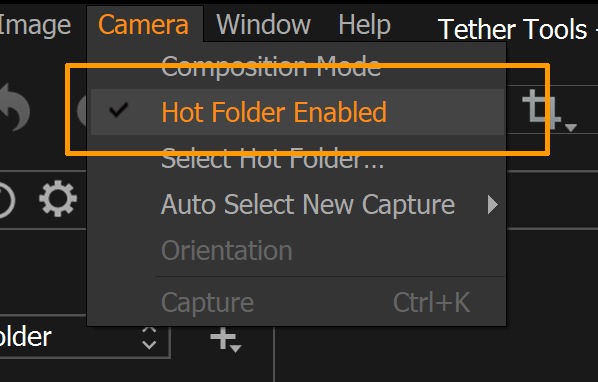
Before I leave Capture One and head to SS4, I need to enable the hot folder. Select Camera > Hot Folder Enabled. You’ll see a checkmark when it’s ON. See image below.
Now let’s head to Smart Shooter.
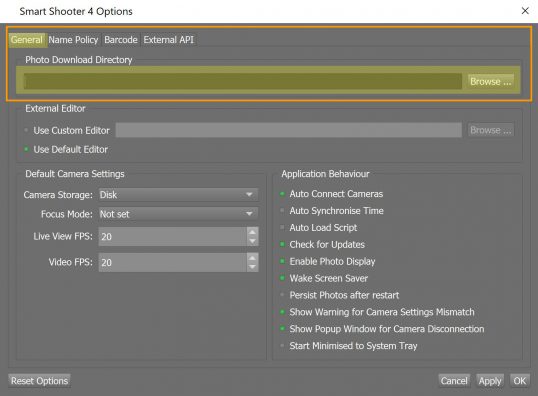
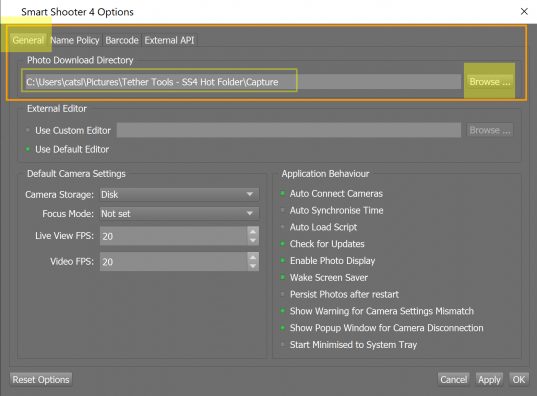
Navigate to File > Options > General (Win) or Smart Shooter > Preferences > General (Mac). Open General, the most recently selected download directory will display, simply Browse to the Capture One file location – identified in the previous step.
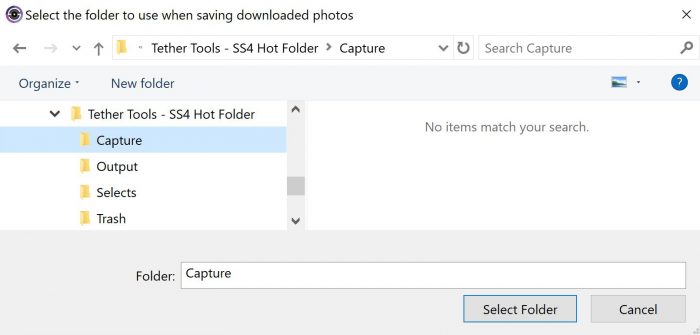
When I click Browse, a new window opens allowing me to drill to the exact location and select the Capture folder. See below.
The drive path has been selected and fills the Photo Download Directory.
It’s that easy!
Now I can take advantage of the features that both tethering software offer. The speedy Smart Shooter with its easy interface and Quick Loupe and Capture One’s presets and premier editing abilities.
Below you can see both Smart Shooter interface and Capture One.