Today, I want to introduce you to the Smart Shooter features. There are three additional functions that are available only in the PRO version. They are:
- Barcode/QR Code Scanning
- Multiple Camera Control
- External API
We’ll go through each one. First, let’s examine how to use the Barcode/QR Code Scanning feature in Smart Shooter. The purpose of the Barcode/QR Code Scanning is for File Naming.
If you want to follow along with this tutorial, you’ll need the PRO version and you’ll need to create some Barcode/QR codes. I created QR codes from https://www.qr-code-generator.com/ – there are many free code generators, you may want to find the one that suits you best.
Now that you have your QR code, you can save it as an image (which is what I did) or print it out.
Next, we need to set up the file naming so our Barcode or QR code data can be accepted and used in the file name. If you’ve used SS4 Standard, it’s likely you’ve used the Name Policy > Filename Expression before, if not, go to:
On Windows: File > Options > Name Policy
On Mac: Smart Shooter > Preferences > Name Policy
I want my images to include “tech tip QR” and the embedded QR code data and a Sequence number. And thinking ahead, I want the sequence number to start at “1” for each new QR code. This is useful for when you need to photograph multiple images for multiple products and/or people.
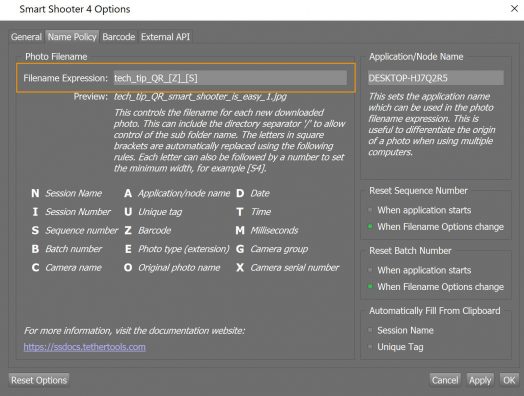
In the Filename Expression box, I entered the following: tech_tip_QR_[Z]_[S].
I entered [Z] for Barcode and [S] for Sequence Number. Each command must be in [Square Brackets] and it’s most useful to separate them by “_” an underscore.
This is will be my image file name, tech_tip_QR_[the name of the barcode]_[the sequence number].
Remember I said I want my sequence number to start at “1” for each new QR code scanned? To do that, I check the Reset Sequence Number When Filename Options change box, see below.
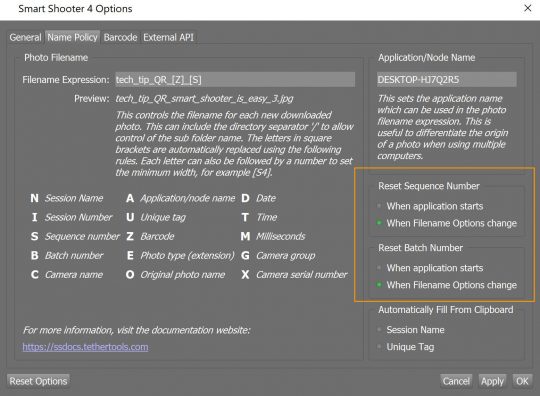
This ensures that each time I scan a new Barcode/QR code that contains new information my sequence number will reset.
One last piece of the puzzle to consider. Do I want each new Barcode/QR code to be automatically scanned or do I want to manually scan it each time? To manually scan, check Enable Live View, point the camera at the QR code and click the QR code icon, see below.
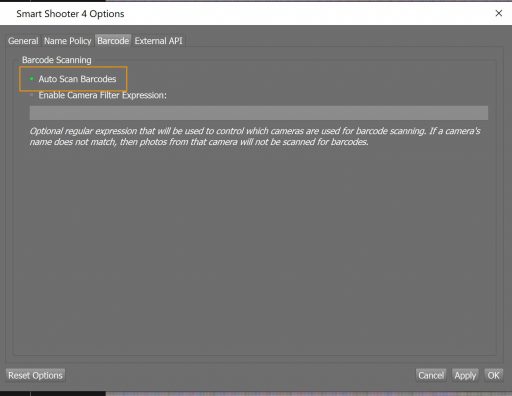
Or turn on Auto Scan Barcodes by checking the box in the Barcode tab.
On Windows: File > Options > Barcode
On Mac: Smart Shooter > Preferences > Barcode
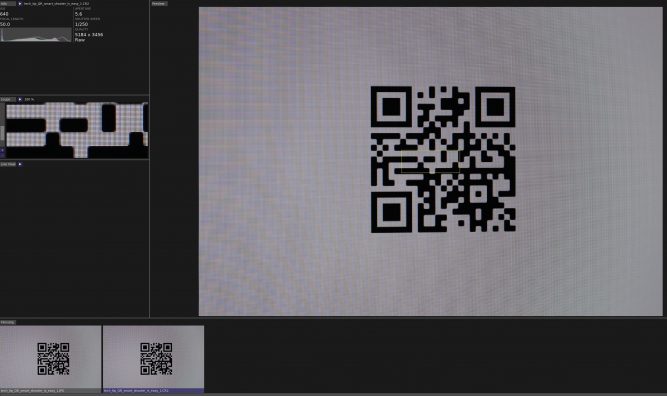
Now I’m ready to begin. My Filename Expression is set to name my images correctly, I have Auto Scan Barcodes turned on and my Sequence number will reset each time I scan a new Barcode/QR code. For this demo, I created a QR code with “smart_shooter_is_easy” as my data assigned. I saved it as an image on my computer.
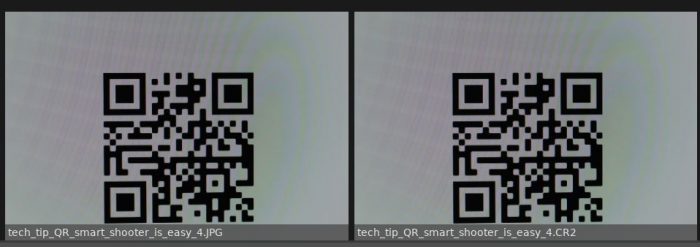
I opened the QR code on a second monitor and focused the camera on the image, it immediately read the coded data and when I took an image, it applied the rule that I assigned, naming my image correctly. See below.
Check back for our next Tech Tip on how to connect and control Multiple cameras.
SMART SHOOTER:
- To get started with Smart Shooter, download a 30 day Free Trial
- Smart Shooter supports Nikon, Canon and Sony cameras, please check for compatibility with your camera.
- See the Smart Shooter User Guide
- Check out the Smart Shooter YouTube playlist