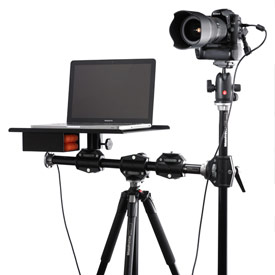
We are introducing a monthly Q&A series where we answer your questions about tethered photography. Send us your specific questions for a chance to be featured next month!
This month’s question came from Austin, a Facebook fan:
Q: How do I tether my Nikon D5000 and laptop?
A: You may want to check out Adobe Lightroom 3, which supports tethered photography for your Nikon D5000 as well as other Nikon and Canon cameras. Unless otherwise designated in that linked list, Adobe recommends a USB 2.0 Cable for optimal performance.
First thing you’ll want to do is configure your tethered capture settings:
- File –> Tethered Capture –> Start Tethered Capture
- In the “Tethered Capture Settings” dialog box, you’ll need to specify your method of importing photos:
- Session: This is the folder that stores the captured images. The “Segment Photos by Shots” option creates subfolders within the session. You can name the subfolders after clicking “OK.”
- Naming: Choose how you want to name photos. “Session Name-Sequence” uses the name entered in Session.
- Destination: Choose a location for the session folder.
- Information: You can add metadata and keywords directly to the imported photos.
- Click “OK” when you’re done.
Here are step-by-step instructions from Adobe.com on capturing photos with a tethered camera:
- Choose a camera from the camera name pop-up menu
- Choose a preset (if desired) to apply on import from the “Develop Settings” pop-up menu.
- Click the “Settings” button in the lower-right corner of the window to edit your capture settings.
- Press Ctrl+T (Windows) or Command+T (Mac OS) to show or hide the tethered capture window.
- If you’re segmenting photos by shots, press Ctrl+Shift+T (Windows) or Command+Shift+T (Mac OS) to create a new shot.
- Click the shutter release button in the tethered capture window to capture a photo. Or, you can press the camera’s shutter release button.
- Choose File –> Tethered Capture and deselect “Auto Advance Selection” if you don’t want Lightroom to automatically select the most recently captured photo.
- Close the tethered capture window or choose File –> Tethered Capture –> Stop Tethered Capture to end your session.
There are a few things you should know before shooting tethered on a Nikon with Lightroom 3. For instance, you have to wait for the image to finish downloading before another photo can be captured when using the computer keyboard to trip the shutter (if you’re pressing the shutter release on the camera then this isn’t an issue).
Also, when tethering with a Nikon camera, images download onto your computer hard rive and won’t save to a CF or SD card. To minimize the risk of lost images, consider using an external hard drive to create an automated continuous back up of the session.
Check out our blog post on Camera Makes and Models Supported for Tethered Photography in Lightroom 3 for more important information on shooting tethered.
More Resources:
- Adobe Help
- Adorama TV – Shooting Tethered Video (The video is older but there are still some good basic tips here)


