The below article is from Chelsea Marrin, a fashion, beauty, and portrait photographer based in Chicago, Milwaukee, and Louisville. Follow her online at www.chelseamarrin.com and on Instagram at @chelsea_marrin.We thank Chelsea for pulling back the curtain on her latest shoot and contributing to the How I Got the Shot Guide: Women’s Edition!
Concept
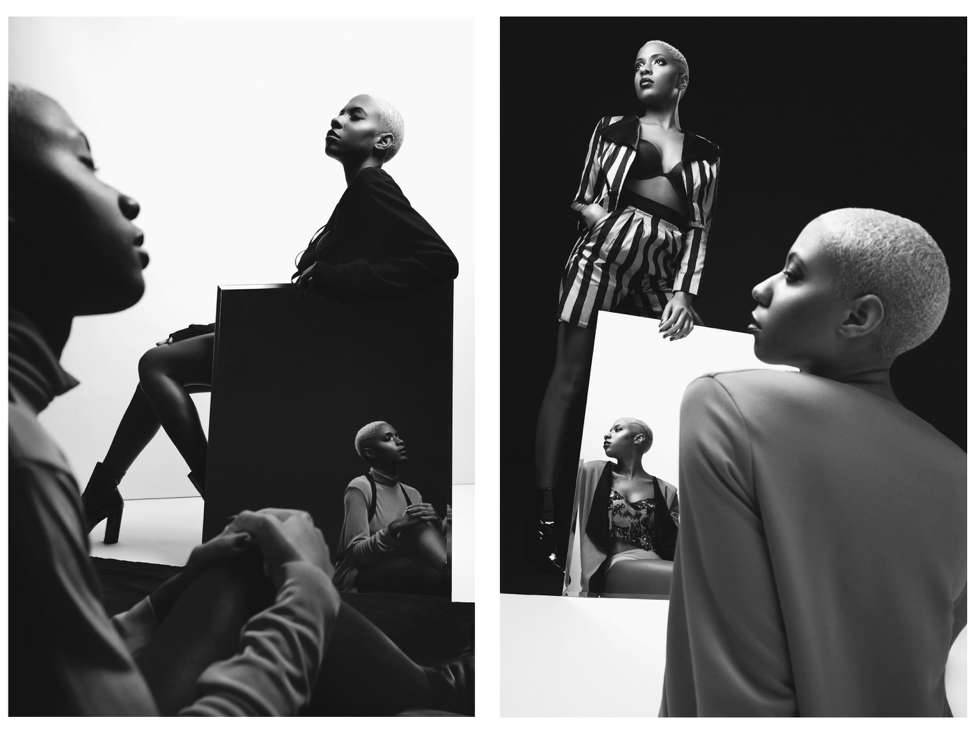
The concept is reflection; not just because we are reflecting models through mirrors, but because it is a cogitation of myself and everything that I have learned in the last year. Looking at the photos, they are similar but completely different. They have the same sets, same lighting styles, same mirror, and same color grade. One feels softer, while the other has a better confidence being shown. Both people are related in the photos, but they are separate individuals. Each picture shows a different model in focus, making it, in a way, their own self-portrait. It creates this complex relationship, but beautifully paints one image when they work together. I want this diptych to be a good start to a new year with the new knowledge that I have obtained.
Setup and Lighting
My favorite kind of lighting situations are in-studio. It makes me feel like a painter. I am able to completely bend the light to my whim and create images that the current natural light would not able to provide me.
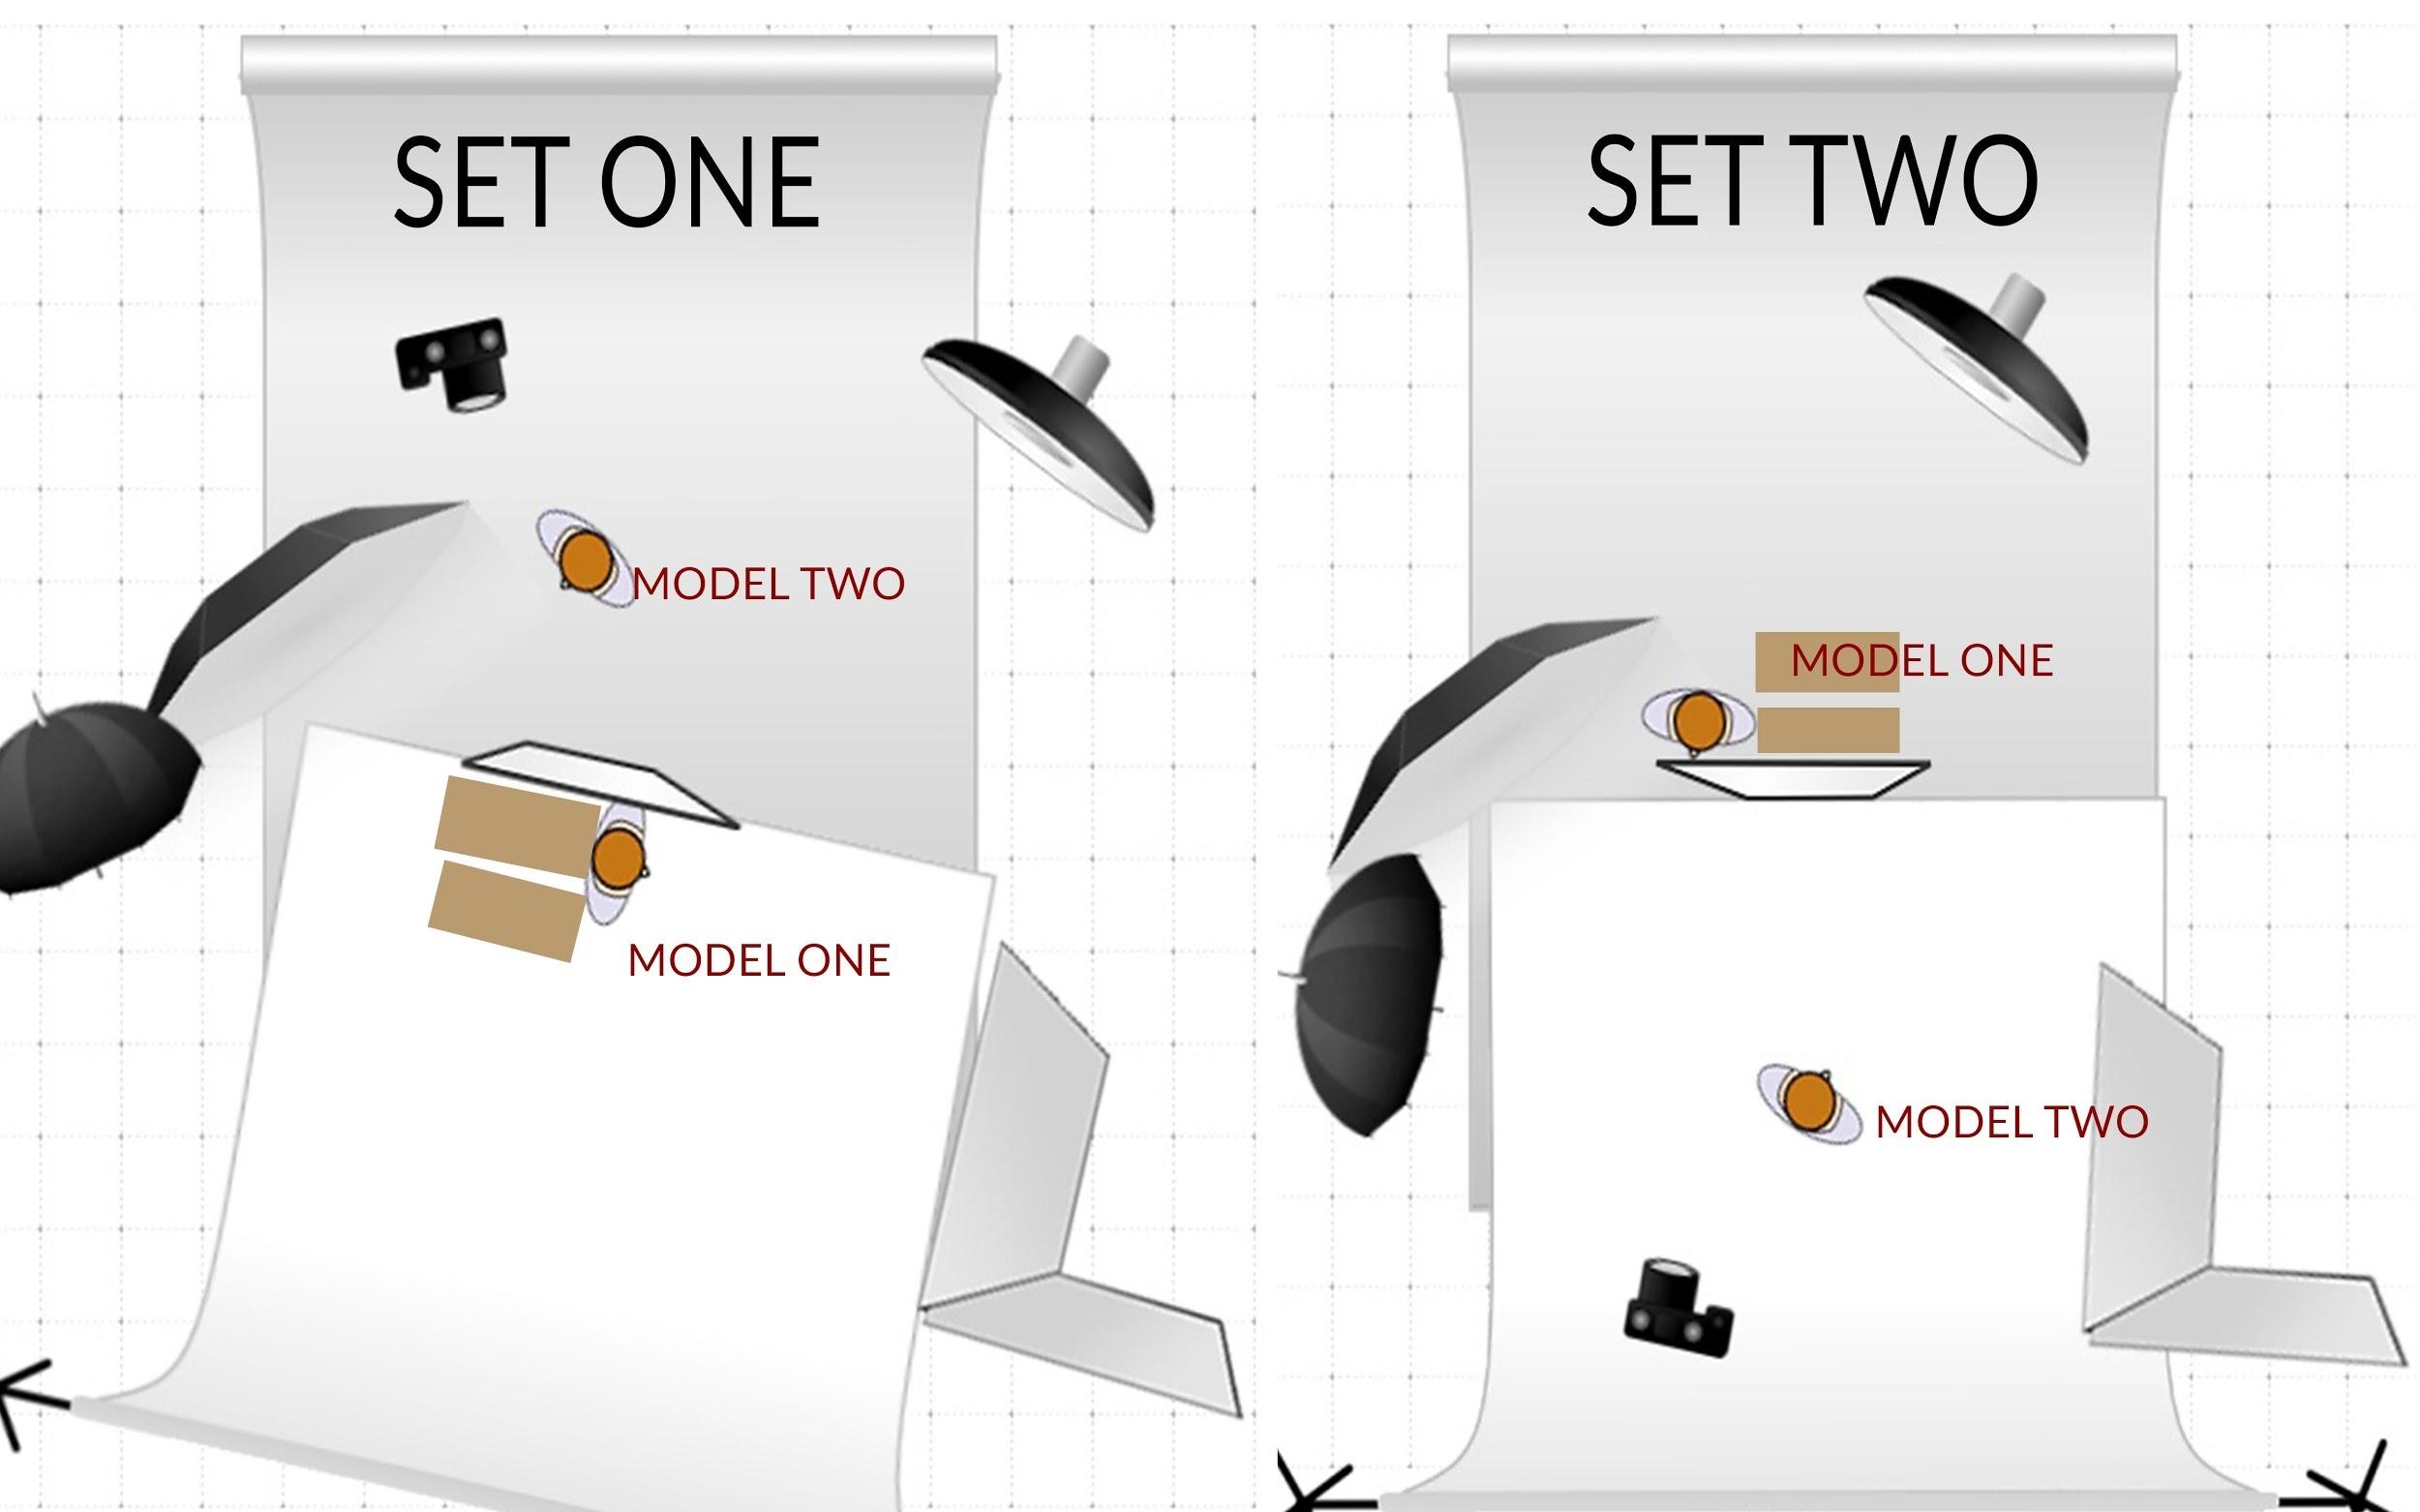
I started out with three Profoto D1’s. These are one of my favorite strobes because they have a higher output and are easy to use. I paired these with the Elinchrom Rotalux Deep Octa 36” as my key light for my first model, placing it next to the mirror with a power level of eight. I had it coming from above on, directly hitting model one’s head, but far enough back and high enough to feather off and be able to give model two on the other set drop off light hitting her face. Next, to the Rotalux, I had a Profoto Shallow White Umbrella 41” pointed toward the background with a power level of five. This served as lighting for my white background and gave model one a nice feather on top of the key light. Finally, I decided to bring in a white V flat for some fill on model one’s face since the lights were going to be hitting the back and top of her body, not the front. This gave her a nice bounce from the key and the background light.
After that, I set up the last D1 with the Profoto White Softlight Beauty Dish Reflector with the Profoto 25 Degree Honeycomb Grid for model two as a backlight with a power level of six. I wanted to keep my black background as dark as possible so lighting her from behind worked the best. For set two, I kept the same lighting but brought it closer to my white background and the models. All power levels stayed the same, we just brought the lights closer to give more of a hard highlight and a perfect white.
Shooting Tethered
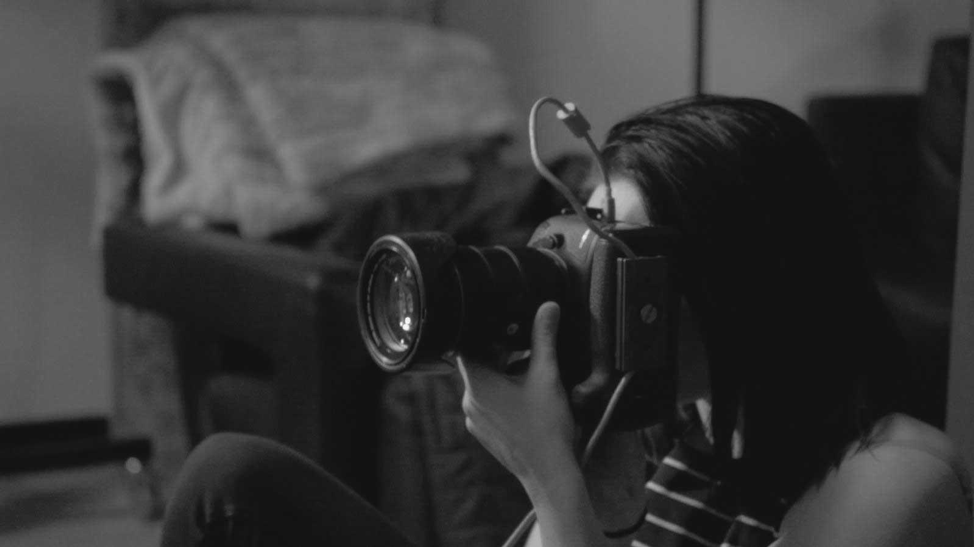
Working with mirrors, a photographer must be very aware of what is in the frame. One must make sure to not only shoot in the right spot but to mount and position the mirror correctly. This is why tethering was so important for this shoot. I needed to see every detail of each shot. Being able to analyze on a monitor helps you to see all characteristics. I was able to notice little pieces of me sticking out or the edge of my seamless coming into the frame before moving onto the next look. It was all about the tiny elements that would be extremely hard to see on the little screen of my camera.
This whole photo shoot is one of the more complicated setups that I have ever done. The photographs I created would not have been achieved without Capture One 11 or Tether Tools. I would have forgotten many aspects that were vital in getting the perfect composition. Not only that, but I was able to frame everything exactly how I wanted. I played on using a lot of geometric shapes to draw the viewer’s eye in more. With shooting tethered, I was able to really compose each shot as carefully as possible.
Challenges
Mirrors, that was my biggest challenge. First was picking the right mirror. The more surface area the mirror had, the more it would reflect. Not only that, but I had to think about how to angle the mirror for each shot. If I was going to use a 45-degree angle, it would risk showing more of the studio ceiling compared to a 60-degree angle. This was a problem I did not think about before setting up this photo shoot. Being a photographer means you are also a problem solver. After figuring out where the mirror was going to go and angling it, it just came down to where I was going to be next. I have never done a photo shoot sitting close to a model until now. It was challenging but I loved every second of it.
Post-Processing
I wanted to do as little Photoshop as possible. I love getting my shots in camera. In my opinion, it not only looks better, but it’s just a personal goal with every shoot. I had to angle myself so not only would I not be in the frame, but neither would the lights. In this case, I had to pick and choose my battles. I would much rather Photoshop little bits of a light out than a full person. The most extensive editing done was adding more background and taking lights out of the shot. I was rather proud that I was able to achieve this before post-processing was involved. Being able to keep track on the monitor is extremely important. Without tethering these photos would have never been nearly perfect. I was able to compose and color grade my shots and make them come right to life on set. It not only made me even more excited for the finished project but it made everyone see that hard work pays off.
Logistics and Gear
I reached out to Taylor and Tyler about photographing them. It was a goal of mine to photograph identical twins. I wanted to capture a photograph to trick people into thinking that it was Photoshopped when really it wasn’t. I had so many different ideas of how to photograph the twins but I wanted to do a setup that I never did before or seen done quite like this. I have assisted on photo shoots with mirrors, but nothing that created two photo shoot sets facing one another.
Think about creating two photoshoots. You need two backdrops, two models, two lighting setups, but just one camera. My team started with setting up the backgrounds, putting them as high as they can possibly go. The reason why I needed them so tall was that I was not sure what degree my mirror was going to be angled at. Next, I taped my white background down to the ground and covered the other half of the set in black cloth. Finally, I was posed with the issue of securing the mirror. Initially, I thought I would have to secure it using sandbags and C-stands. Funny enough, I was able to just lean it on two apple boxes, making it easy to move and adjust as the shoot went on.
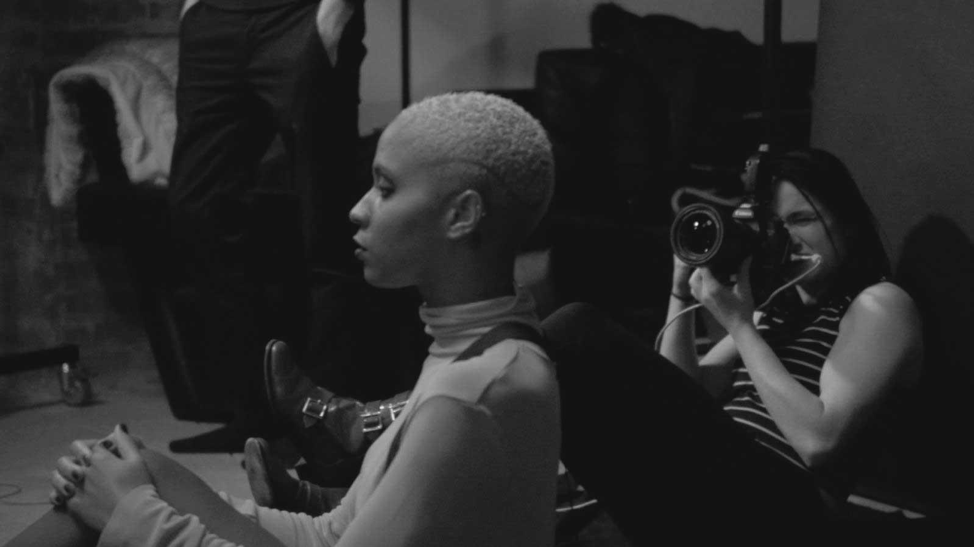
The most complicated part was the positioning of each model. Once light tests and makeup were done I was able to put both twins into the frame. It all came down to really focusing on composition for each shot. That is why tethering was vital to this photo shoot. Without it, I would not be able to compose everything as I did. Not only that, but I could show each twin what emotion or pose I liked best through my monitor as we reviewed the pictures together.
This website stores cookies on your computer. These cookies are used to collect information about how you interact with our website and allow us to remember you. We use this information in order to improve and customize your browsing experience and for analytics and metrics about our visitors. Accept
This website uses cookies to improve your experience while you navigate through the website. Out of these, the cookies that are categorized as necessary are stored on your browser as they are essential for the working of basic functionalities of the website. We also use third-party cookies that help us analyze and understand how you use this website. These cookies will be stored in your browser only with your consent. You also have the option to opt-out of these cookies. But opting out of some of these cookies may affect your browsing experience.
Necessary cookies are absolutely essential for the website to function properly. These cookies ensure basic functionalities and security features of the website, anonymously.
Cookie
Duration
Description
cookielawinfo-checkbox-analytics
11 months
This cookie is set by GDPR Cookie Consent plugin. The cookie is used to store the user consent for the cookies in the category "Analytics".
cookielawinfo-checkbox-functional
11 months
The cookie is set by GDPR cookie consent to record the user consent for the cookies in the category "Functional".
cookielawinfo-checkbox-necessary
11 months
This cookie is set by GDPR Cookie Consent plugin. The cookies is used to store the user consent for the cookies in the category "Necessary".
cookielawinfo-checkbox-others
11 months
This cookie is set by GDPR Cookie Consent plugin. The cookie is used to store the user consent for the cookies in the category "Other.
cookielawinfo-checkbox-performance
11 months
This cookie is set by GDPR Cookie Consent plugin. The cookie is used to store the user consent for the cookies in the category "Performance".
viewed_cookie_policy
11 months
The cookie is set by the GDPR Cookie Consent plugin and is used to store whether or not user has consented to the use of cookies. It does not store any personal data.
Functional cookies help to perform certain functionalities like sharing the content of the website on social media platforms, collect feedbacks, and other third-party features.
Performance cookies are used to understand and analyze the key performance indexes of the website which helps in delivering a better user experience for the visitors.
Analytical cookies are used to understand how visitors interact with the website. These cookies help provide information on metrics the number of visitors, bounce rate, traffic source, etc.
Advertisement cookies are used to provide visitors with relevant ads and marketing campaigns. These cookies track visitors across websites and collect information to provide customized ads.

 The below article is from Chelsea Marrin, a fashion, beauty, and portrait photographer based in Chicago, Milwaukee, and Louisville. Follow her online at www.chelseamarrin.com and on Instagram at @chelsea_marrin.
We thank Chelsea for pulling back the curtain on her latest shoot and contributing to the How I Got the Shot Guide: Women’s Edition!
The below article is from Chelsea Marrin, a fashion, beauty, and portrait photographer based in Chicago, Milwaukee, and Louisville. Follow her online at www.chelseamarrin.com and on Instagram at @chelsea_marrin.
We thank Chelsea for pulling back the curtain on her latest shoot and contributing to the How I Got the Shot Guide: Women’s Edition!
 After that, I set up the last D1 with the Profoto White Softlight Beauty Dish Reflector with the Profoto 25 Degree Honeycomb Grid for model two as a backlight with a power level of six. I wanted to keep my black background as dark as possible so lighting her from behind worked the best. For set two, I kept the same lighting but brought it closer to my white background and the models. All power levels stayed the same, we just brought the lights closer to give more of a hard highlight and a perfect white.
 This whole photo shoot is one of the more complicated setups that I have ever done. The photographs I created would not have been achieved without Capture One 11 or Tether Tools. I would have forgotten many aspects that were vital in getting the perfect composition. Not only that, but I was able to frame everything exactly how I wanted. I played on using a lot of geometric shapes to draw the viewer’s eye in more. With shooting tethered, I was able to really compose each shot as carefully as possible.
 Think about creating two photoshoots. You need two backdrops, two models, two lighting setups, but just one camera. My team started with setting up the backgrounds, putting them as high as they can possibly go. The reason why I needed them so tall was that I was not sure what degree my mirror was going to be angled at. Next, I taped my white background down to the ground and covered the other half of the set in black cloth. Finally, I was posed with the issue of securing the mirror. Initially, I thought I would have to secure it using sandbags and C-stands. Funny enough, I was able to just lean it on two apple boxes, making it easy to move and adjust as the shoot went on.
 The most complicated part was the positioning of each model. Once light tests and makeup were done I was able to put both twins into the frame. It all came down to really focusing on composition for each shot. That is why tethering was vital to this photo shoot. Without it, I would not be able to compose everything as I did. Not only that, but I could show each twin what emotion or pose I liked best through my monitor as we reviewed the pictures together.
 To download this guide and including 29 more articles, download the How I Got the Shot: Women’s Edition on TetherTools.com. Each educational article features a different image, behind-the-scenes video, and a detailed breakdown of how the shot was made.